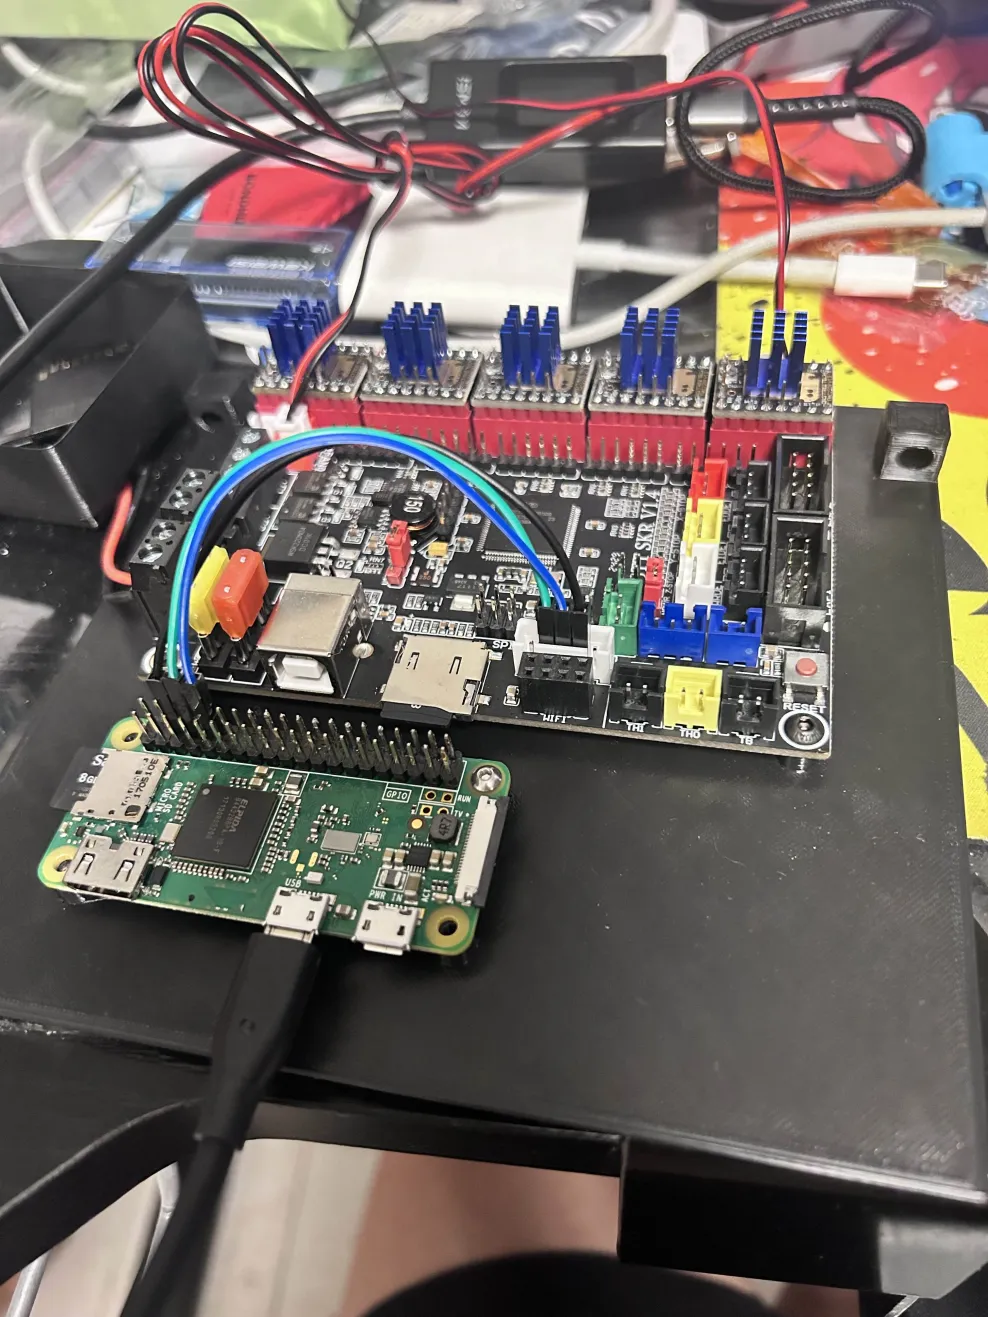
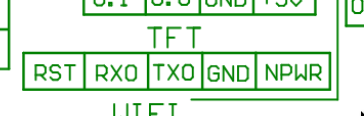
- Black for Ground
- Green for RX on the SKR 1.4 and TX on the Raspberry Pi
- Blue for TX on the SKR 1.4 and RX on the Raspberry Pi

[all]
dtoverlay=pi3-miniuart-bt
enable_uart=1
Make sure to check that these things, pi3-miniuart-bt and enable_uart=1 are not written anywhere else further up in this file, because you might already be using them for something else. But if you know those pins were never used then you can safely delete those lines containing them.
Open your cmdline.txt to make sure that you aren't using those pins to connect to the console too. There might be a console=serial0,115200 in there if you are, in which case you might want to do something else for console and delete that from it.
Otherwise, that is all you have to do to enable UART on your Pi. Just reboot your Pi and run ls /dev/ttyS0 and ls /dev/ttyAMA0 to check if you have one or the other present. Both files might be present too, but that is okay. This file is created by the driver for communicating over UART, and Klipper will use it
Next, you will need to go into the Klipper directory, which usually involves cd Klipper and run
make menuconfig
In my case like I did in the picture above, the SKR 1.4 I connected the pins to P0.3 and P0.2 so I need to configure them as such:
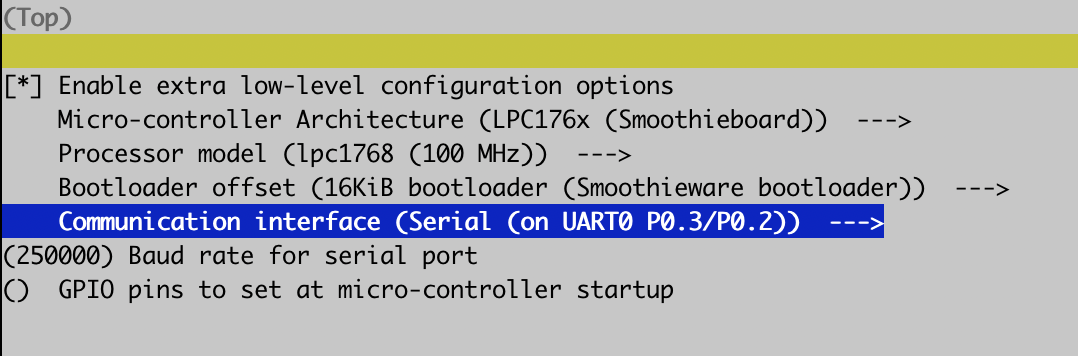
And then I go through the process of flashing my SKR 1.4 by make and then copying the klipper.bin to an SD card and inserting that SD card into my SKR 1.4.
[mcu]
serial: /dev/ttyS0 # or /dev/ttyAMA0
restart: command